
Jump to...
Rubric Updates (10-2025)
New Features from your HQ Dashboard
Previously when you were ready to begin an observation, you would type the learner’s name into the search box in the upper left of your HQ Dashboard.

You can still do that, but instead of clicking “Start Rubric” you will see “Go to Rubrics”.

This is our all new Learner Rubrics page and it comes with some great updates. You can also get to this page by going to your content tab and clicking on Observe.

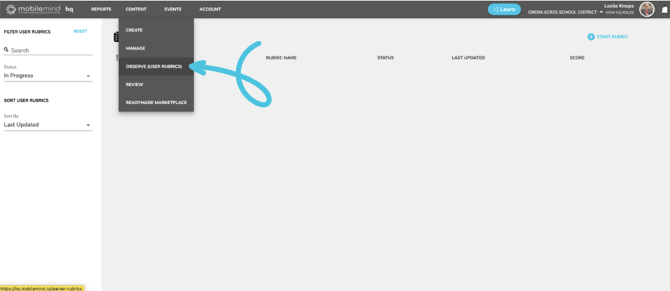
Now let’s take a look at what you will see on this page:
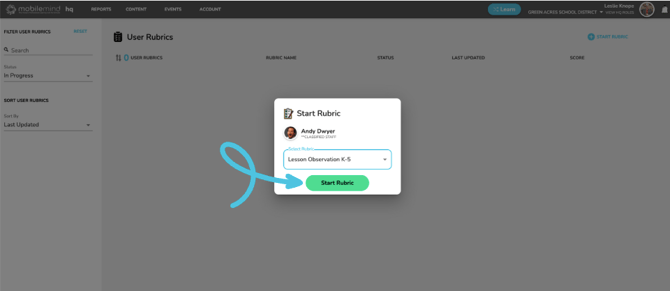
If you are ready to do an observation, you will click on Start Rubric.

Type in the first or last name of the person you will be observing and click on their name.

Now select the rubric you would like to use and then click Start Rubric.

Let’s take a look at a few updates when filling out a rubric:
The first thing to notice is there is now a SAVE PROGRESS button on the right side of the top banner. Once you begin a rubric, it will automatically save and it will auto save every 30 seconds going forward, but you can always click the save button as well.

You have the option to not score the rubric if this is being used for coaching purposes.

If one of the criteria is not applicable for this observation, you can click the N/A button and those points will be subtracted from the total points for this observation.

After you have filled everything out, you can save the rubric and go back to type in your notes and suggestions at a later time.

You can now see that this rubric is still In Progress in the status column.

Let’s go back into this rubric and finish it up. Add your notes and suggestions and change the date if you observed this person prior to completing the rubric. Then click Submit Rubric.


You will now see that the rubric is not listed, but let’s take a look at the filters on the left sidebar. This page will default to the In Progress rubrics, but you can select what you would like to see on the left sidebar.

You can search for a learner or you can filter based on rubric status.


Using Checkboxes in your Rubrics
You may be doing an observation where you are looking to see specific behaviors. In this case, you may want to have the option to use checkboxes.
When creating your rubric, you now have the option to choose to use Levels for the criterion as before or you can choose to use checkboxes.

Add the description for each checkbox. You can add more items in your list as needed by clicking Add Checkbox in the bottom right.


You can now give a point value for each option.

You have the option to choose a max score for this criterion. I have five options for this criterion, but I don’t want to penalize a teacher if I don’t see all of them so I will set the max score for this criterion at 3.

Now I am going to add my next criteria. You can choose to do more checkboxes or you can use the levels.


When your rubric has been created and you are ready to observe a teacher, you will see that you can check all the boxes, but since I set the max score for that criteria to be three points, that will be their total.


If I only check two boxes, they will receive those two points. You can choose to use the point system however is most beneficial for your district.


Rubric Updates (09-2025)
Below you will find the first features of Rubrics version 2 to be released.
You will now be able to:
- Add a description for the rubric as a whole when creating rubrics.
- Choose to complete a "no points" rubric.
- Add an overall note at the end of the rubric.
- Choose a date the observation was completed.
- Allow the teacher to respond and sign the rubric.
- Easily print the completed rubric.
Rubric Description is directly under the rubric title.

You can also complete a rubric without assigning points, which creates a more collaborative, coaching-focused experience.

After you finish completing the rubric, you’ll have the opportunity to add overall notes.

If the observation occurred on a different day than when you’re completing the rubric, you can easily update the date.

Learners can access the rubric from their MobileMind Backpack, provide their responses, and complete the digital acknowledgment and signature process.


Learners can print their completed rubric for personal records. For best results, ensure your printer settings allow background graphics.


Content Genie now allows users to create a course from a PDF file, providing an alternative to video-based courses!
In addition to pasting a YouTube link, you now have the flexibility to either locate your PDF file or simply drag and drop it into the designated PDF space. After you upload your PDF file, you can select a submission type. If you would like Genie to scan the images from the PDF in the course creation process, simply check the box located beneath the PDF upload area. Please note that selecting this option may extend the time it takes for Genie to generate your course.
Once you are ready, click, "Let's GO!" and Genie will go to work!


Workspace File Embed now includes Microsoft tools.
In addition to embedding Google files in your MobileMind course, you now have the option to embed Microsoft files, including PowerPoint presentations, Excel spreadsheets, and Word documents. Furthermore, you can directly display a PDF on the course page, eliminating the need to link it in the Materials section.
When embedding files from Sharepoint, make sure to follow the directions you see when you click on the "How does this work" link.


When you view the course from the Learn side, you will see a button to expand, if the learner would like it to be a bit larger.


Category Management Move
Managing your categories hasn't changed, but the button has moved. You will now see a new button under the Content tab called Manage. Here you will find the ability to manage your Categories, Credit Types, and Standards.

Credit Type
We have a brand new feature in MobileMind called CREDIT TYPE. You can now use this feature to differentiate content into buckets such as On or Off Contract Time, Continuing Education, Salary Advancement Eligibility, etc.
Click Create, then Manage, and then choose Credit Type.

Click New Credit Type from the Upper Right

Type in your credit type and click save. Continue to add your credit types in the same way.


When you create a course, you can now choose to add one or multiple credit types and you can choose how much time to assign to each type of credit. The time does not need to total the amount of time you are awarding for course completion.


In Events, you will go to the Participants page to assign a Credit Type.

Standards
You can assign standards to both courses and events, which helps ensure alignment with the domains utilized during walkthroughs and observations. This feature also allows you to focus on specific standards that your district is prioritizing for the current school year.
Click the Content, Manage, and then choose Standards.

Click New Standard in the upper left.

Type in the name of your standard and then click Save. Continue doing this in the same way until you have all of your standards entered.


When you create a course, scroll to the bottom of the course info page. Start typing the first few letters and then choose which standard(s) you would like to attach to this course.


In Events, you will go to the Details Page and scroll to the bottom to attach Standards to an event.

Event Check In Improvements
QR Code Scan - Automatic Check In
Participants no longer need to enter the join code manually; scanning the QR code will automatically check them in! Please ensure that participants are logged into the MobileMind app before attempting to scan the QR code.
While setting up your event on the registration page, simply toggle the button to activate QR code scanning for automatic participant check-in.

Automatic conference check in when you check into a session
If you have opted to award credit for individual sessions instead of the entire conference, participants will no longer need to check in separately for both the conference and each session. Once they check in to a session, their attendance at the conference will be automatically recorded.
On the participants page when setting up your conference, choose to award credit in the sessions.

Once a participant is checked into a session, they will automatically be checked into the conference.


Event Waiting List
Participants can now join a waiting list if an event has reached its maximum capacity. Upon joining the waitlist, they will NOT be automatically added to the event. Instead, they will receive an email notification if a spot becomes available, allowing them to RSVP for attendance.
To enable participants to join the waitlist, simply navigate to the registration page of the event, conference, or conference session and switch the "Allow Waitlist" option to the on position.


If the event reaches full capacity, participants will be informed that no seats are available, but they will have the option to join the waitlist.

If a spot becomes available, participants will receive an email notification containing a link to "View in MobileMind" and RSVP for the event. Please note that participation will be determined on a first-come, first-served basis.


Participants have the option to leave the waitlist at anytime.

Print Conference Schedule
Participants can now easily print or save the conference schedule or their own schedule.
From the conference page you can choose to continue viewing all the available sessions or you can click the filter button and toggle to see only the sessions you have registered for.


You will then click the Print Schedule button and then use your computer's tools to print or save the PDF.


