Streamline feedback collection and improve your events with easy-to-use, built-in feedback forms.
Imagine effortlessly gathering valuable insights from attendees after your event. Built-in feedback forms make this a reality, giving you a direct line to what attendees liked, what could be improved, and what they'd love to see at future events.
With Built-In Feedback Forms you will get:
- Seamless Integration: No need for external tools or complicated links. Feedback forms are embedded directly within your MobileMind Events creation page, accessible with a single click for attendees as soon as they check-in to the event.
- Increased Response Rates: Convenience is key! Built-in forms encourage participation by making feedback effortless for attendees and you can even make them required to receive credit.
- Actionable Data: Gather specific feedback on sessions, speakers, content, venue, and overall experience. Utilize open-ended prompts and rating scales to get a well-rounded picture.
- Improved Future Events: Analyze feedback to understand what resonated and what needs tweaking. Refine your conference format, speaker selection, and content based on attendee preferences.

From your Events page in HQ, go to the bottom of your left sidebar and click Feedback Forms under the Customize heading.

Click Create Form

Type in the Form Name and choose your Numerical Scale. Whatever you choose for the scal will be the same for all questions in this form that use a numerical scale question.

Type in your Question and choose Numerical Scale for question type.

Type in the description for the bottom part of your scale and then the top part of your scale. These can be different for each question.

Choose if you would like this question to be required.

Click Add Question when you are ready.

You can also choose to ask an open ended question by selecting Paragraph as the question type.

Once you have finished adding your questions, click Save Form.

When you get to the Resources section of your event, you can choose to use a Link to an External Form (green arrow), one of your Custom Forms (blue arrow), or create a new form (brown arrow) by clicking on Manage Feedback Forms.

If you choose Custom Form in the drop down, you will then click the drop down arrow on Select Form. The list of forms you have already be created will show up and you can choose which form you would like to use.


You can now decide if you would like the form to be Required and if you would like it to be Anonymous. Please note: If you choose to make it anonymous, you can not change this later.

Participants will check into the event and then the Feedback Form will show up on the left sidebar. If you don't want participants to have access to the form until after the event, wait until the event is ending to give them the join code.


They will fill out the form and then click Submit Form. Then they will see the answers they submitted.


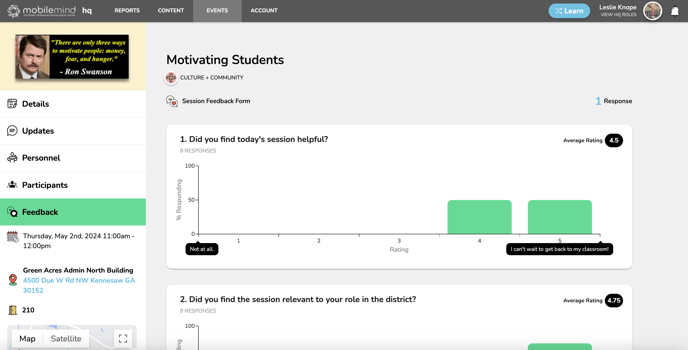
From the event on the HQ side, you will click on the Feedback button on the left sidebar to view the results.